


 FAQ
FAQPushing & Pulling is a technique used to Pushing and pulling is a technique used during film development to compensate for under or overexposure – giving you more control in tricky lighting or for creative effect. It’s important to note that pushing and pulling only occur during processing. Regardless of what ISO you shoot your film at, it’s not technically considered a push or pull unless development times are adjusted to match. If you shoot at a higher or lower ISO but don’t push or pull during processing, it’s simply under- or overexposed. Because this can be a confusing concept to start, our latest article explains when and why to push or pull, how to meter and shoot, and what to expect from different film types. We’ve also included helpful tips, sample photos, and recommended films. If you do push or pull, be sure to clearly mark the push amount on the film canister and select it when placing your order at TheDarkroom.com.
Everything you need to know about Pushing & Pulling Film!
There are many variables that will affect the results of pushed or pulled film, like; the light you’re shooting in, metering, and film type.
Scene light – pushed film will typically do better in even light since it can have increased contrast. A scene with very harsh/contrasty light isn’t always ideal for pushed film because it’ll make it harder to keep your highlights from blowing out and reduce shadow detail. If you have enough light we recommend no push as box speed will typically preform best but if the light is very dark and you need an extra stop or two of light to get a good exposure with a shutter speed of over 60th, then a push can come in very handy.
Accurate metering always helps. If you underexpose your shots you have increased grain, less detail in the shadows and mid-tones, and you may experience an unpleasant color shift with greenish shadows and off-color skin tones. So if you are shooting, say 400 iso film as 800iso then you will meter it as 800iso and it is till good to err on overexposure by metering for the shadows.
Film type – B&W is the most commonly pushed film and pushes the best as you wont have any color shifts. Typically lower contrast film stocks like Ilford HP5 400 or Kentmere Pan 400 push very well compared to Kodak Tri-X 400 which which has higher contrast without a push. Both color negative film and slide film can be pushed but know that there will be increased contrast, saturation, color shifts, and more noticeable grain and some color film will push better than other, especially Cinestill film which is designed to be pushed.
The best way to understand the effects of pushing is to push your favorite film in various lighting and see how it performs, take notes and over time you’ll get to know how that film reacts to pushing and pulling and what its limitations are.
Reasons to Push or Pull Film
Push – Low light and shutter speed not suitable for handheld photos. Low light is the most common reason people push. As a guide, when shooting handheld with an SLR, it’s best to keep your shutter at or above 60th of a second. With a rangefinder, you want to stay at or above a 30th of a second shutter speed—for anything lower you should either use a tripod or push your film a stop or two.
Push – Creative effects – Pushing is a fun way to change the look and many people push B&W and color film to get more contrast and increased grain – the more you push it the more contrasty and grainy your photos will be. Color film will have more saturation and possible color shifts.
Push – An overcast day or the sun is going down. Shoot a 100-speed film and gain two extra stops (+2) by shooting at ISO 400 and develop it at ISO 400.
Pull/Push – You didn’t change the speed on your camera. You shoot 400 film at 100 ISO. Develop it at 400 (-2 Stops) and your photos should come out fine.
Pull – Sunny, bright, and high-contrast light. Pulling film reduces contrast and brings out details in the shadows.
Pull – Creative effects – Pulling film mutes colors and flattens the image with less contrast.
Terminology and Reference
ISO / Film Speed
Often referred to as film speed, ISO is a measurement of light sensitivity.
Lower numbers represent less sensitivity to light. “Slow” film (low ISO) is a finer grain film, needing less light but requires a slower shutter speed, while “Fast” film (higher ISO) has more grain, a higher sensitivity to light, and can be used with fast shutter speeds.
What is a “STOP”
A stop is doubling or halving the amount of light let in when taking a photo.
A stop is a common term in photography and important in the pushing and pulling process, especially when you complete the film processing form. 400 ISO film set at 800 on your camera is 1 Stop (+1) underexposure because it’s doubled. But if you put 400 ISO film as 200 on your camera – that would be a 1 Stop (-1) overexposure because you halved it.
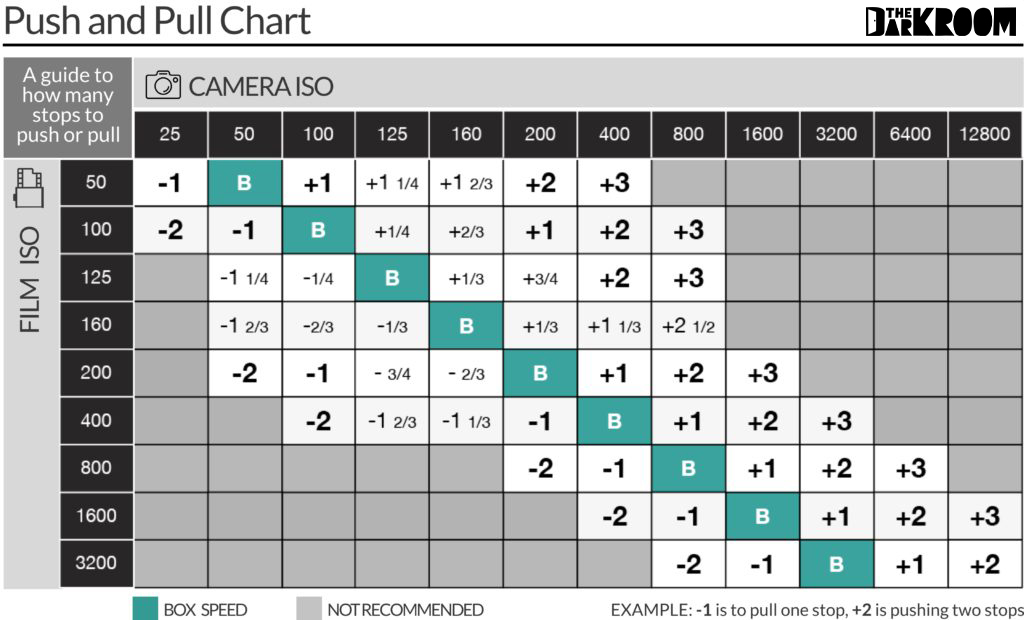
Push and Pull Chart
This chart simplifies how many stops a film is pushed or pulled when changing the ISO. For example, 400 ISO film set at 800 on your camera is 1 Stop (+1).
How to Shoot Pushed or Pulled Film
There are 2 parts to pushing or pulling film… 1) Shooting the image and then 2) developing the roll at the lab. This section details how to shoot and develop pushed or pulled film.
1) Shooting – Pushed/Pulled Film
To start, you will need a camera that allows you to manually change your ISO. When pushing or pulling you simply set your camera or meter to the desired speed (different than the film speed) and shoot the film as you normally would. Pushing film
Pushing film
Most common in low light situations the film ISO or speed isn’t fast enough to shoot at box speed or suitable handheld shutter speed. Increasing (pushing) the ISO a stop or two allows you to shoot at a faster shutter speed or with a smaller aperture to increase the depth of field. Pushed film has increased contrast in the lighter areas with minimal effects on the shadows. To preserve the details in the shadows, make sure to meter for medium to darker areas of the image. If you have 400 ISO film and you set it as 800 on your camera, that will be a 1 stop underexposure. When you are finished with the roll, write “+1” on the film cartridge and the order form so the lab knows to push it a stop in development.
Pushing Characteristics:
Increases film contrast, More grain, Lightens Image When developed bright areas become lighter, but shadows stay more or less the same—increases the contrast and grain of the film.
Pulling film
While the pulling technique can be done on color film, it’s not recommended and it’s almost exclusively done with a black and white film. Most people pull film in sunny, bright, or high-contrast light. Pulling decreases contrast, but brings out details in the shadows. If you have 100 ISO film and you set it as 50 ISO on your camera, that will be a 1 stop overexposure. When you are finished with the roll, write “-1” on the film cartridge and the order form so the lab knows to pull it a stop in development.
Pulling Characteristics:
Less contrast with increased details in shadows, flat and overall dull negative, darker image.
Metering Tip – The most common mistake we see with regular and pushed black & white film is underexposure. When it comes to metering for color negative – and especially black and white film – be mindful of what you’re metering for. We recommend metering for the shadows in even light and metering for the mid-tones in high-contrast light. This will help you get better details in the shadows.
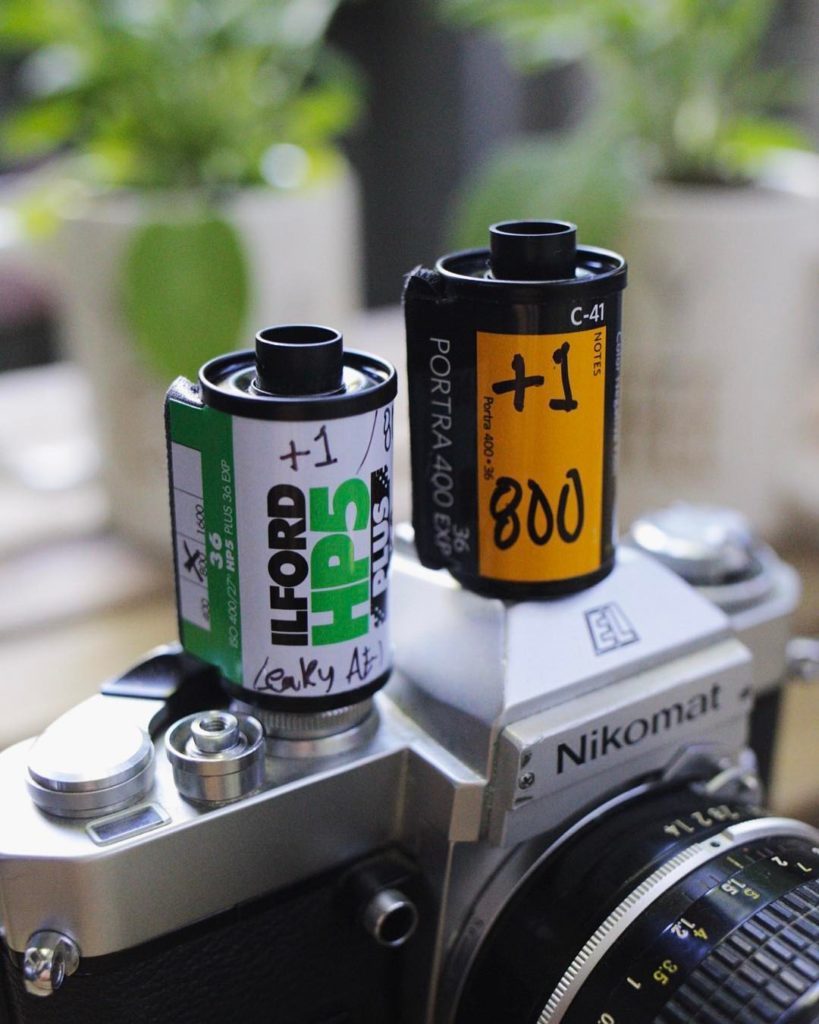
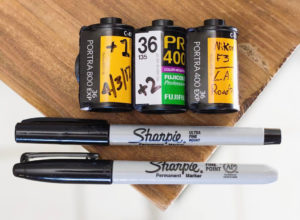
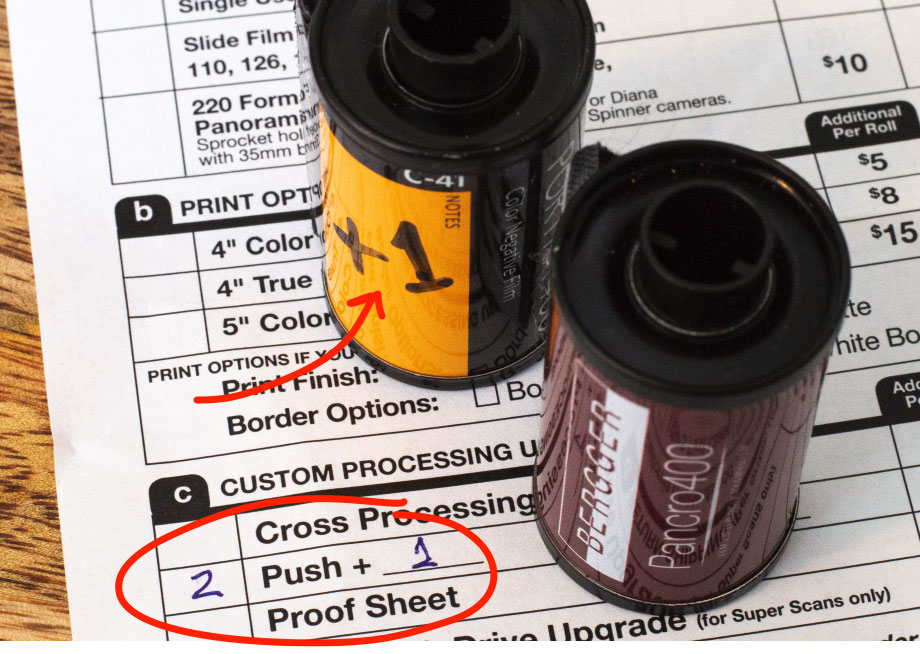
Mark your film – Once you’re done with the roll, be sure to write the push amount (+1, +2, etc.) on the film cartridge with a sharpie so the lab knows that it needs to be pushed. Also, select and write in the push amount on the order form. This will help ensure proper development in the lab.
2) Developing – Push Processing & Pull Processing
When the film is developed, Pushed film is left longer in the developer and Pulled film shorter, compensating for the different ISO setting, underexposing or overexposing film. Because Push and Pull processing time matters, it’s important to give instructions to the film lab and have the canister marked.
If you shoot 400 ISO film as 800, that is a 1 stop underexposure which will require a 1 stop push in development by processing it as an 800 ISO film. If you shoot a roll 1 stop under-exposed and don’t push in development, your photos will be under-exposed.
How We Push and Pull Your Film at The Darkroom
At The Darkroom, we make pushing and pulling your film easy and accurate thanks to our traditional dip & dunk processing method. Unlike automated machines, dip & dunk allows us to customize development times for each roll – perfect for handling push and pull requests.
Whether you’re pushing a roll of black & white film two stops in low light or pulling it for high-contrast scenes, our team adjusts the development process accordingly. We develop all film types – Black & White, Color (C-41), and E-6 Slide Film – with black & white being the most commonly pushed.
Because dip & dunk doesn’t involve rollers or physical contact with your film, it’s also one of the safest and cleanest ways to develop film—ideal for preserving sharpness and image quality, especially when pushing or pulling.
Just mark your roll (+1, -1, etc.) and note the push/pull amount on your order. We’ll take care of the rest.
Push and Pulled Film Examples
Portra 400 at 200 -1 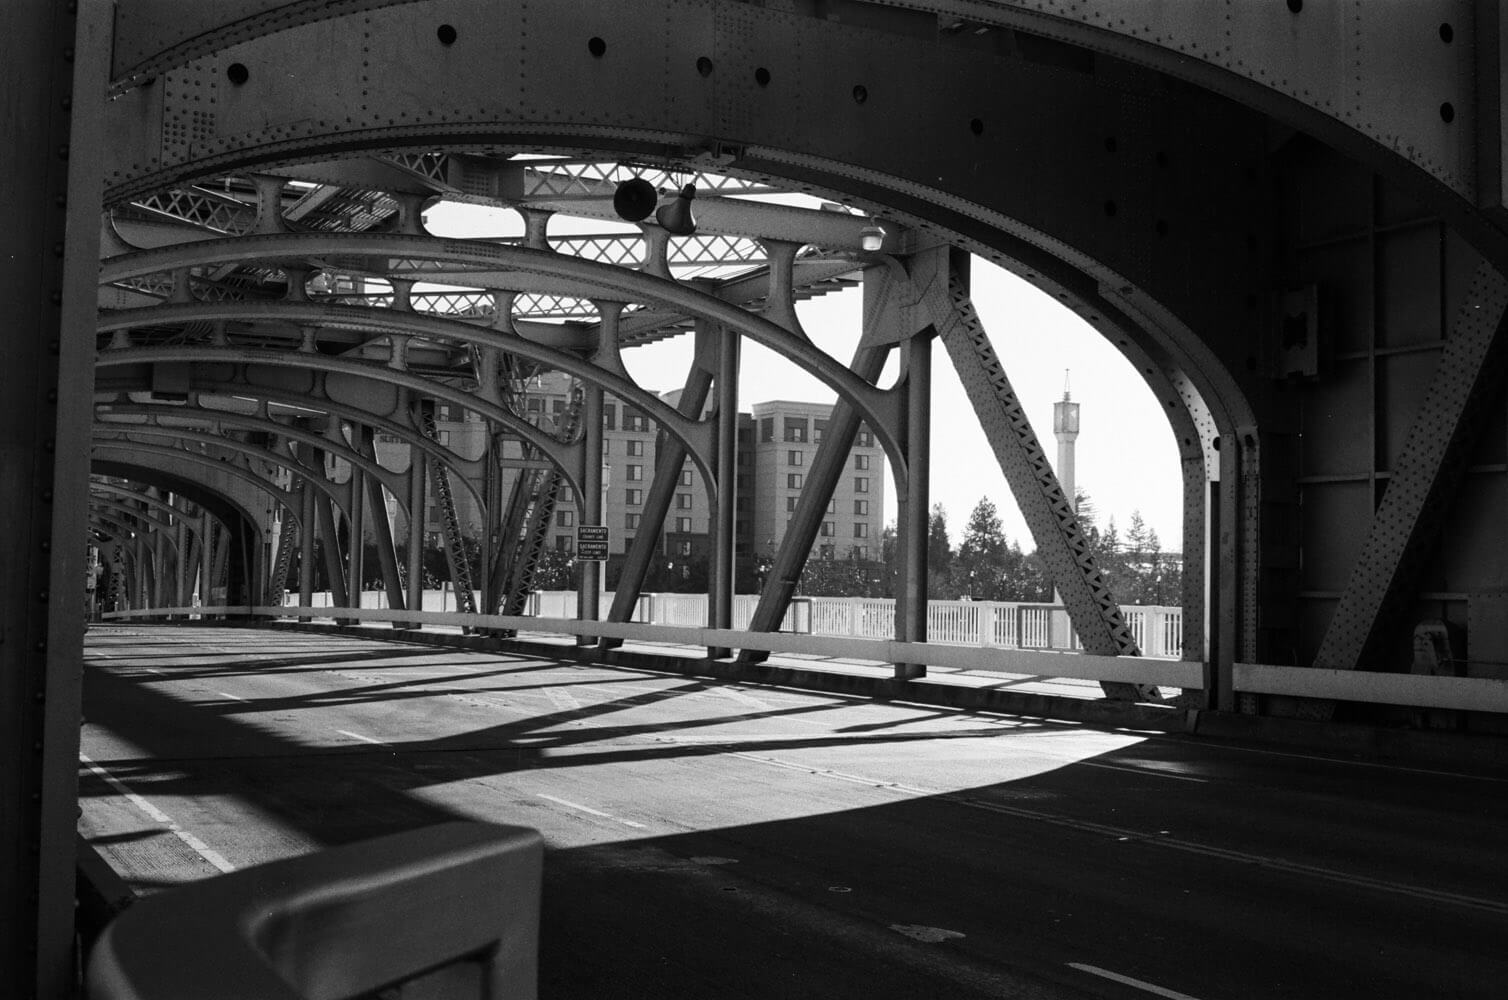
Kodak TRI-X 400 at 200 -1 
Portra 400 at 800 +1 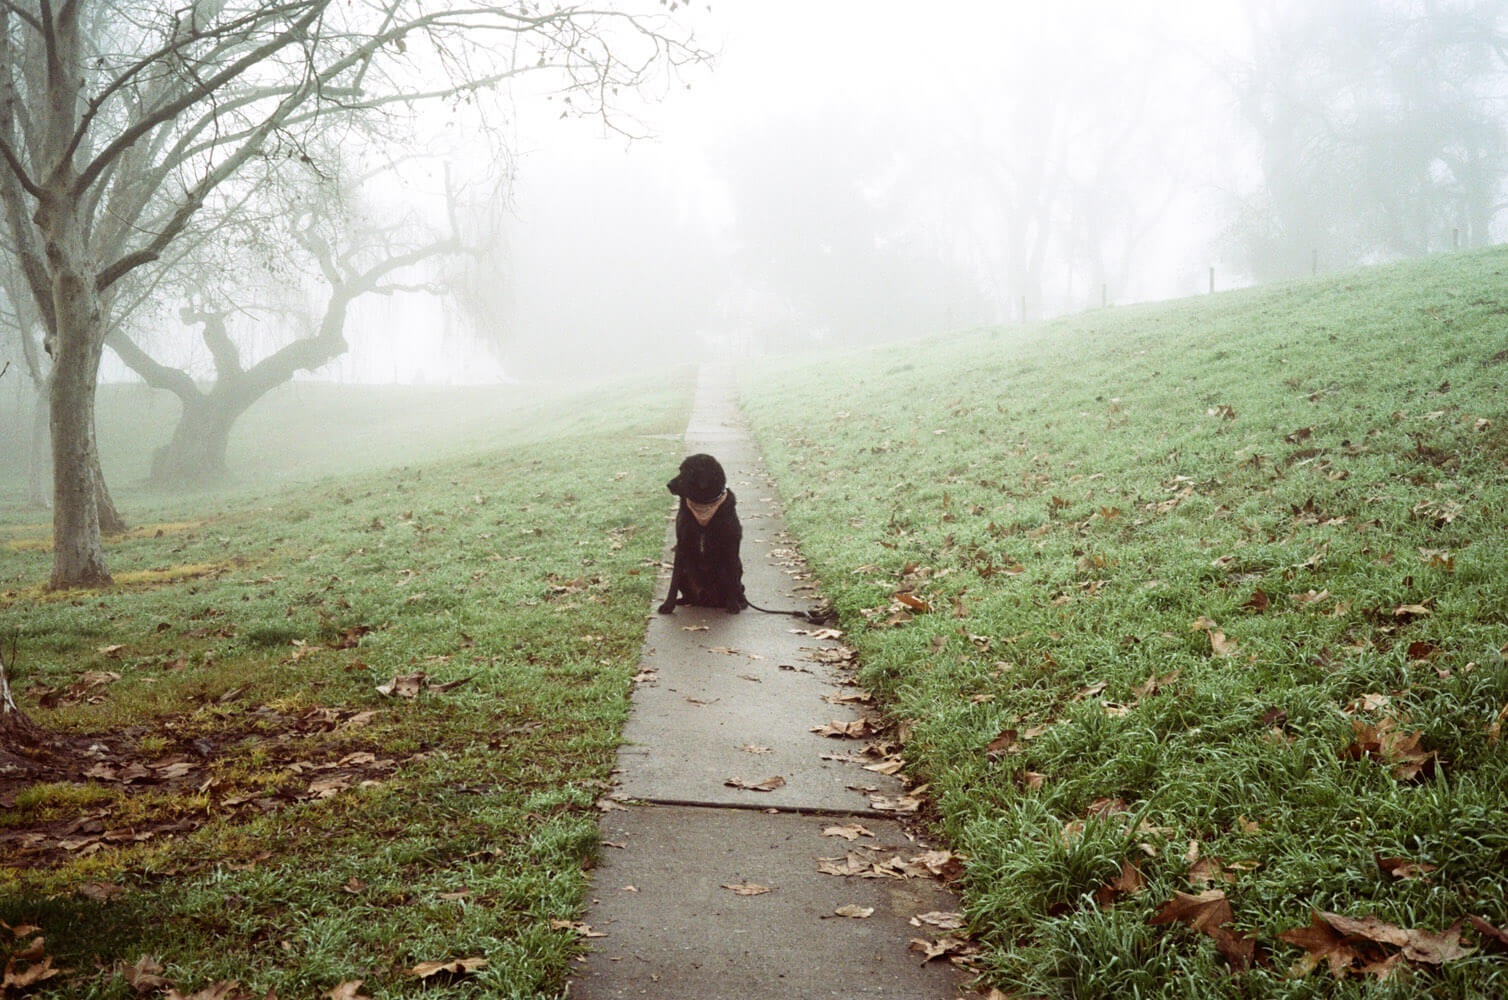
Portra 
Provia 100F at 200 +1 
Provia 100F at 200 +1 
Kodak TRI-X 400 at 1600 +2 
Cinestill 800T at 1600 +1 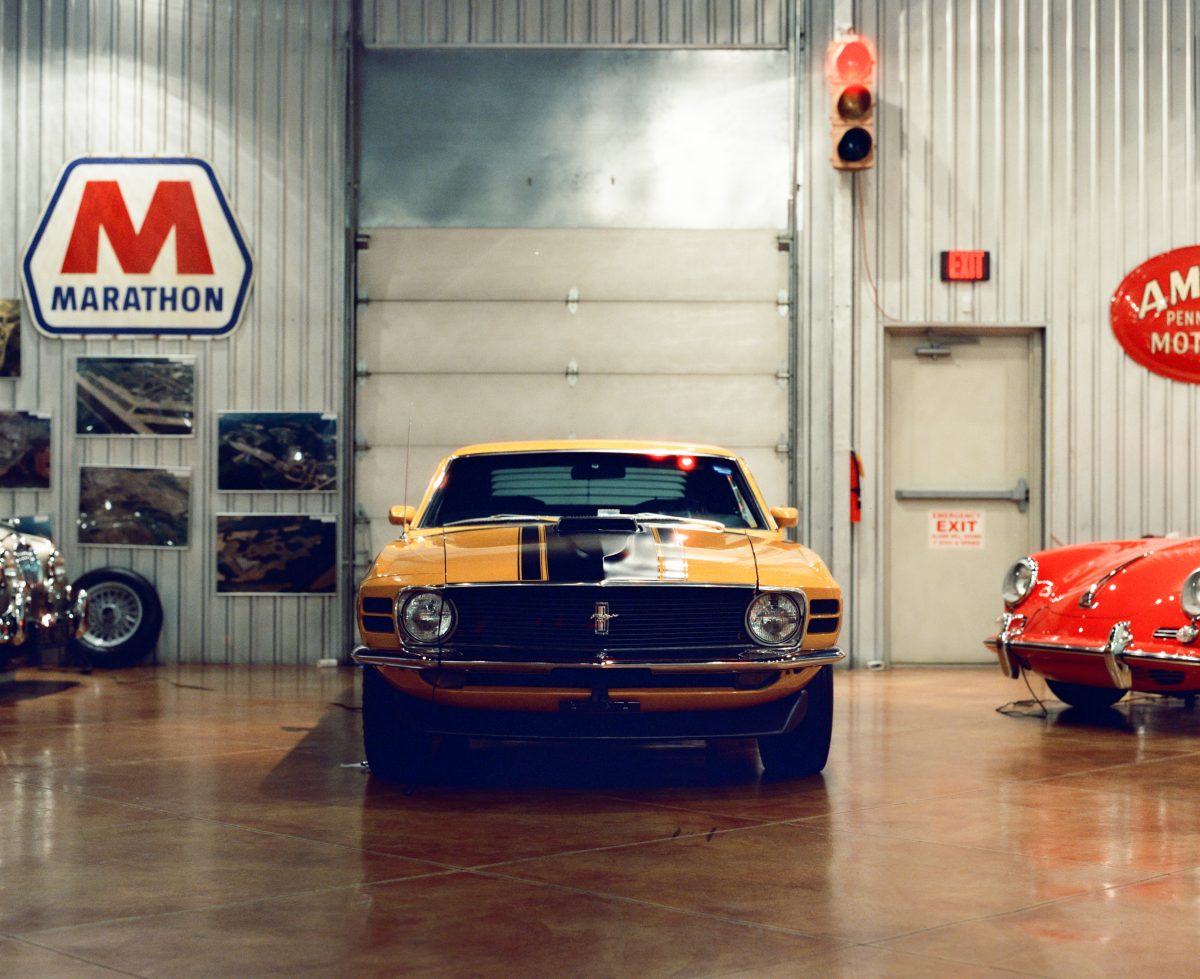
Cinestill 800T at 1600 +1 
Kodak Portra 800 at 1600 +1 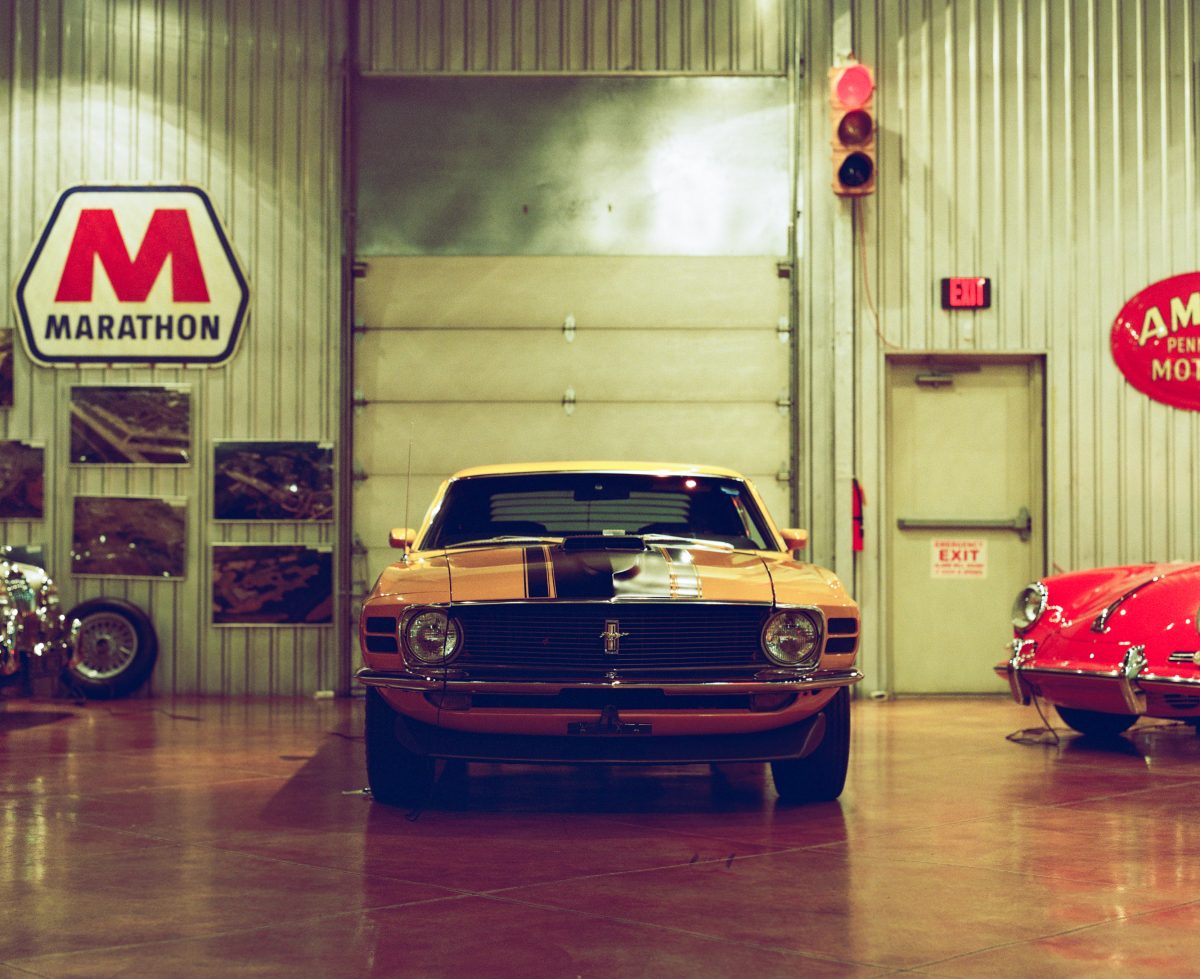
Kodak Portra 800 at 1600 +1 
Kodok Kodacolor 100 at 200 +1 
Kodok Kodacolor 100 at 200 +1 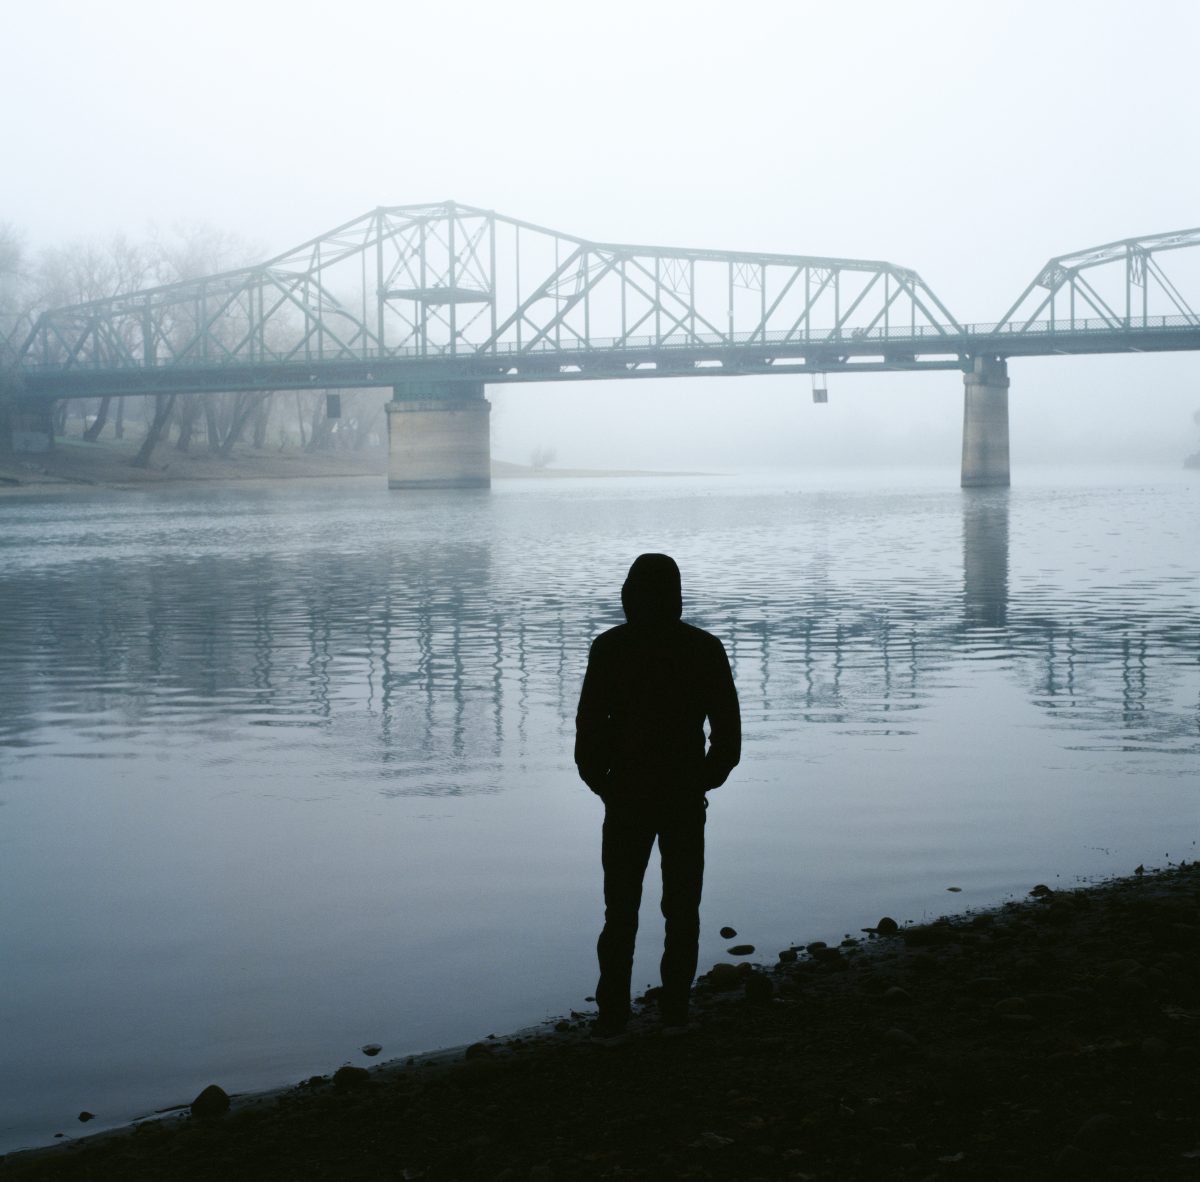
Kodak EktaChrome 100 at 200 +1 
Kodak EktaChrome 100 at 200 +1 
Cinestill 400D at 800 +1 
Cinestill 800T at 3200 +2 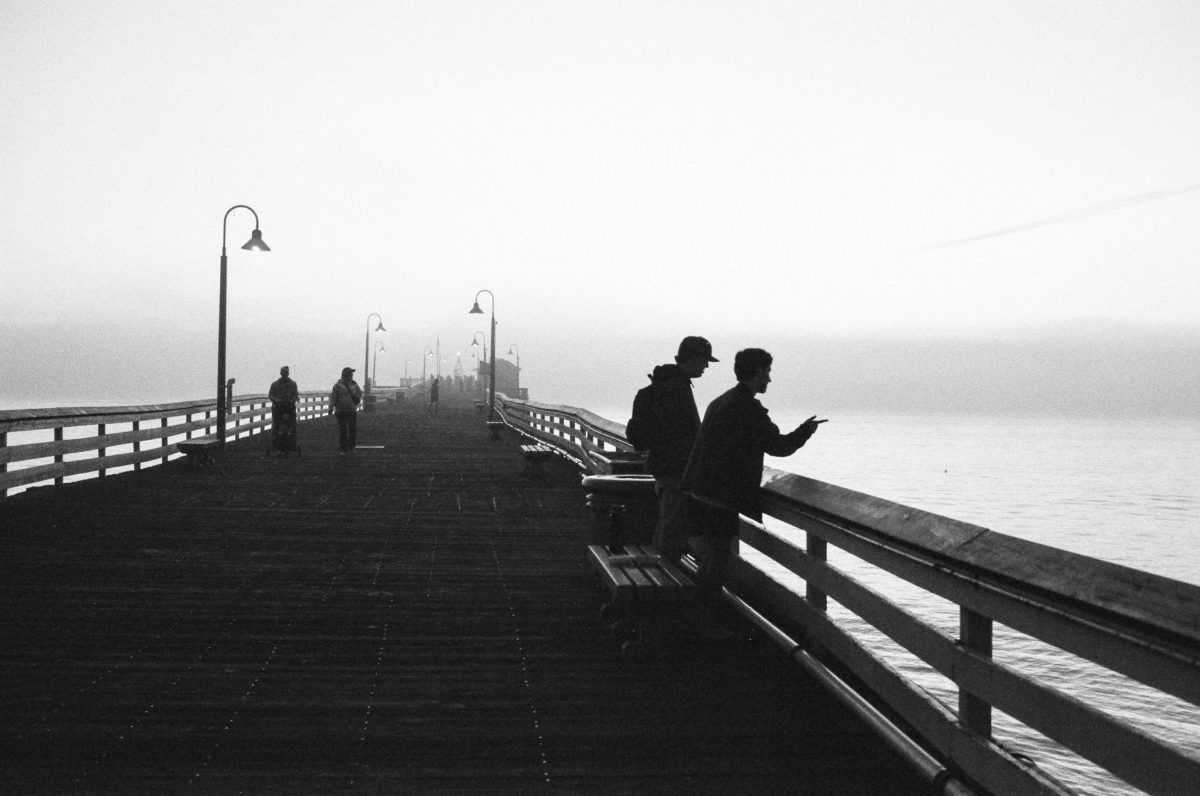
Ilford HP5 400 at 1600 +2 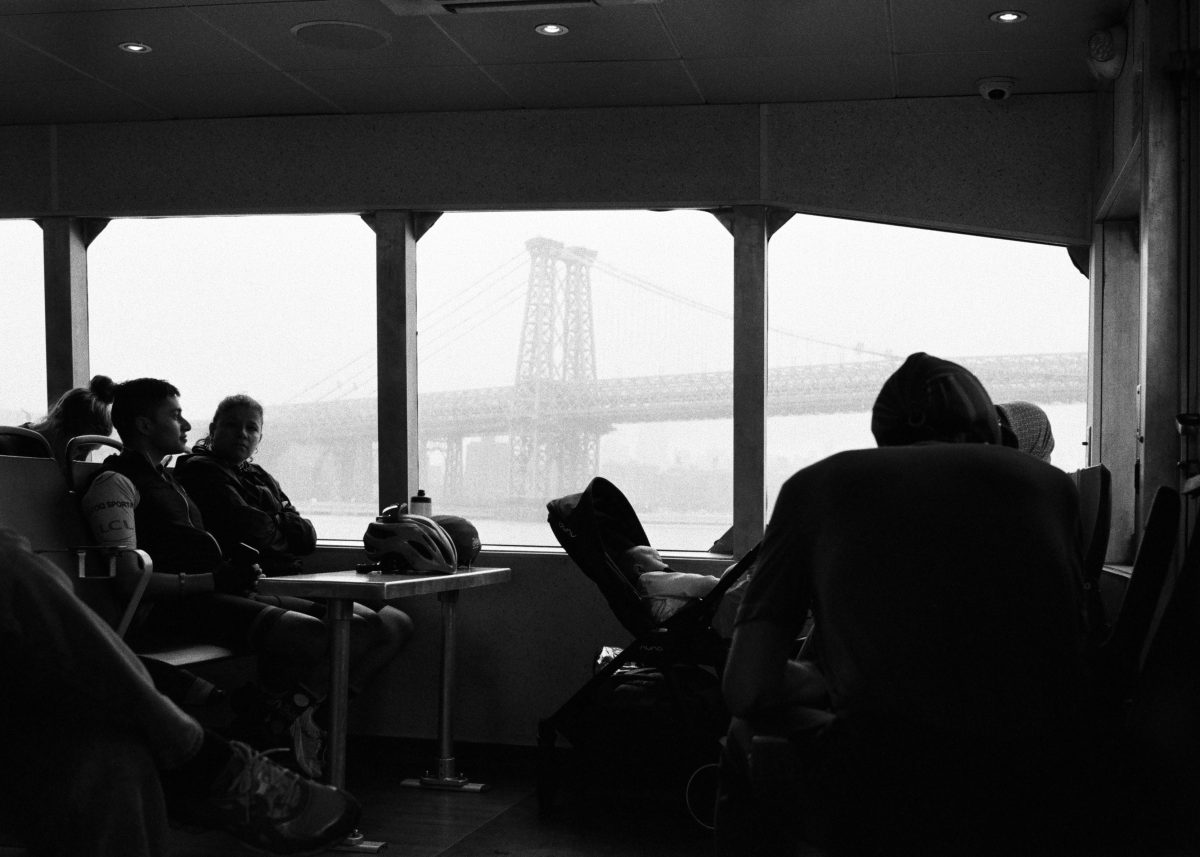
Ilford HP5 400 at 800 +1 
Ilford HP5 400 at 200 -1 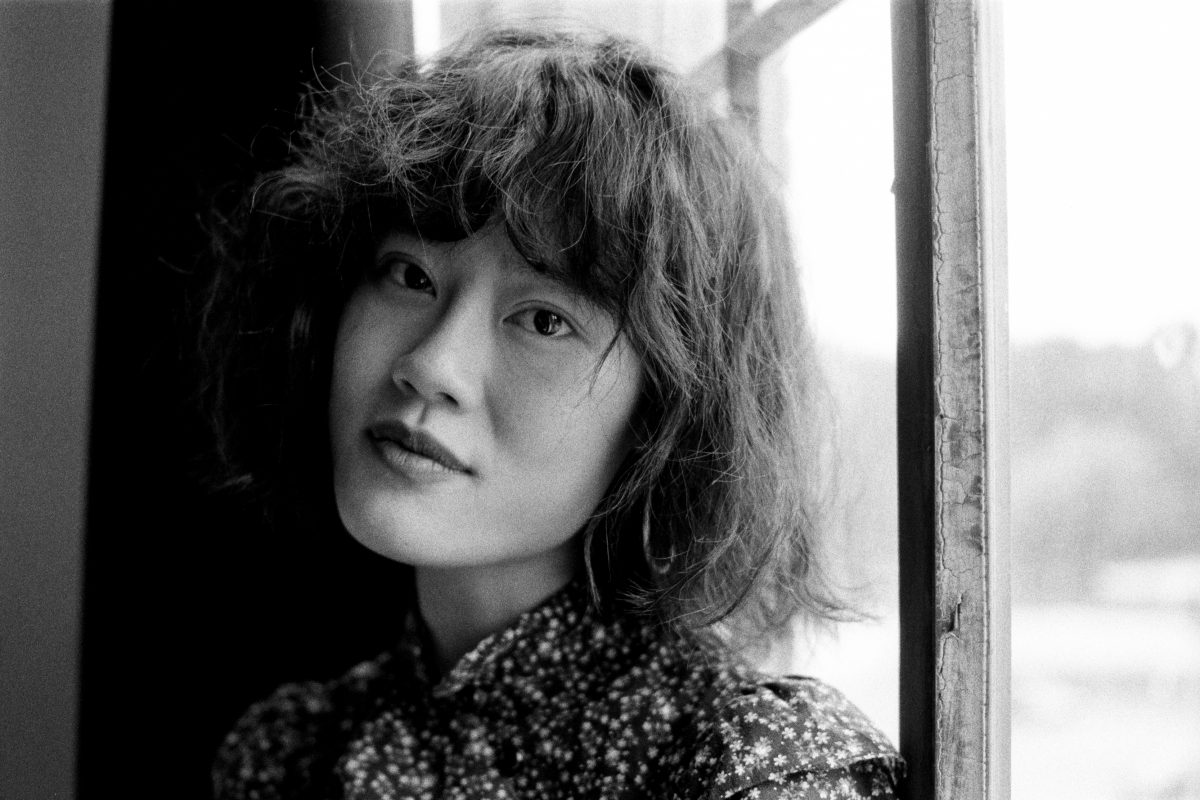
Ilford HP5 400 at 800 +1 
Cinestill 800T at 3200 +2 
Kentmere 400 at 800 +1 
Kodak TRI-X 400 at 200 -1 
Kentmere 400 at 1600 +2 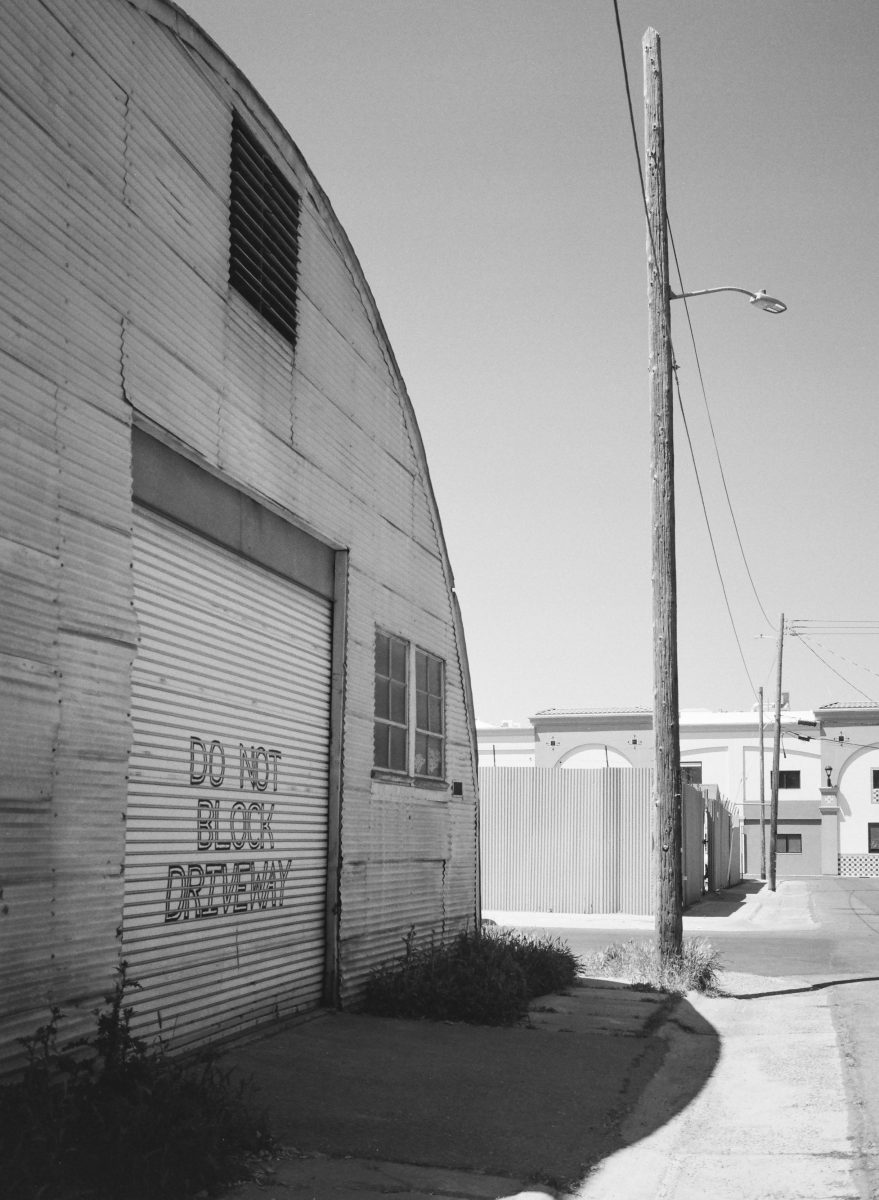
Ilford HP5 400 at 200 -1
Other examples of pushed film:
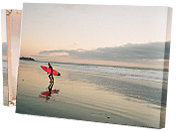
Dark Scenes
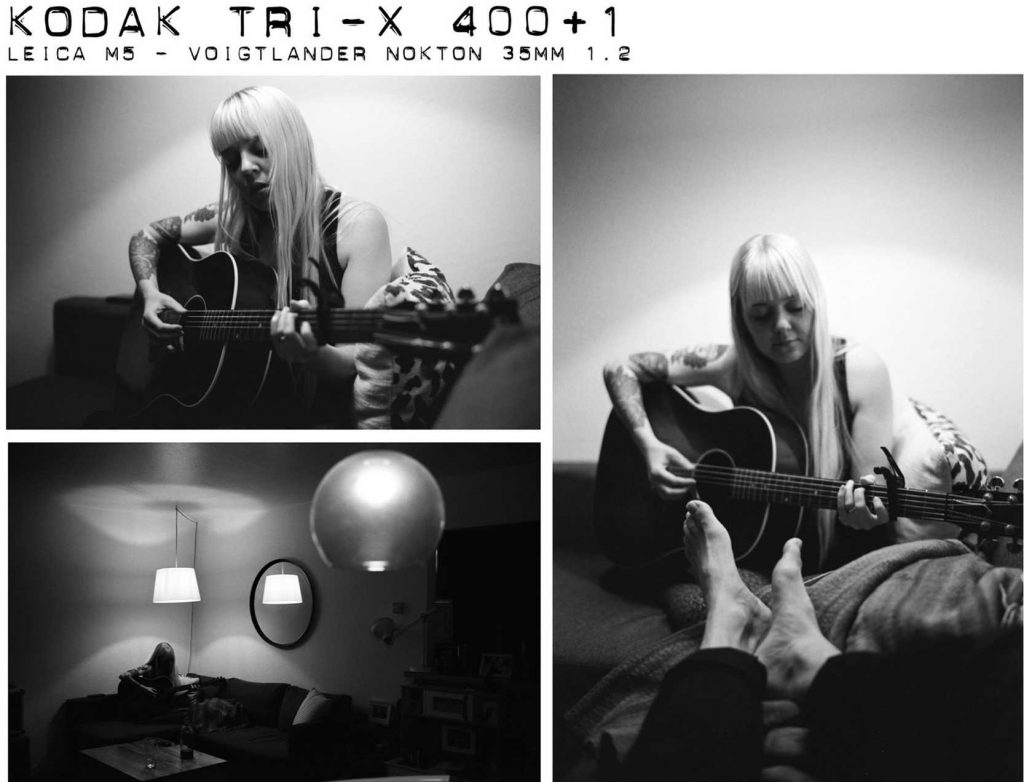
Dark scenes like this can be hard to photograph which why you often need to push your film or have a very fast lens, and in this case, both were needed! This is Kodak Tri-X 400 shot as 800iso and pushed 1 stop in development. It was taken with a Leica M5 and a super-fast Voigtlander Nokton 35mm f/1.2 that @kehcamera sent us! This combination, along with a rangefinder that allows you to shoot at slower handheld shutter speeds is ideal for lowlight shooting. All three of these were shot wide open at f/1.2 and produced very sharp results – we’re loving this lens so far and will be sharing more results in the future!
The Best Films for Pushing
While nearly all film types can be pushed, some have better results than others. Generally, pro-grade film stocks that have great exposure latitude will be best for pushing.
Pushing B&W film
True black and white film is the best and most common type of film to push. Pushing film will both increase the film grain, making it more noticeable, and will add more contrast to your photos. In fact, many people push black and white films solely to get more contrast out of certain film stocks.
Recommended film stock to try – Tri-X 400 & Ilford HP5 plus. Kodak Tri-X or Ilford HP5 – See a comparison of the two films
Pushing Color negatives
Color negatives are the second most commonly pushed film. Pushing color negatives results in slight color shifts from increased contrast. Grain is also more noticeable.
Recommended film stock to try – Portra 400 & Fuji Pro400H View sample of pushed Portra 400
Pushing slide film
E-6 slide film is the least common film to push but can be pushed with good results. As with color negative film, you will see an increase, in contrast, possible color shifts, and slightly more noticeable grain.
Recommended film stock to try – Provia 100f & Velvia 100 View sample of Pushed Velvia 100